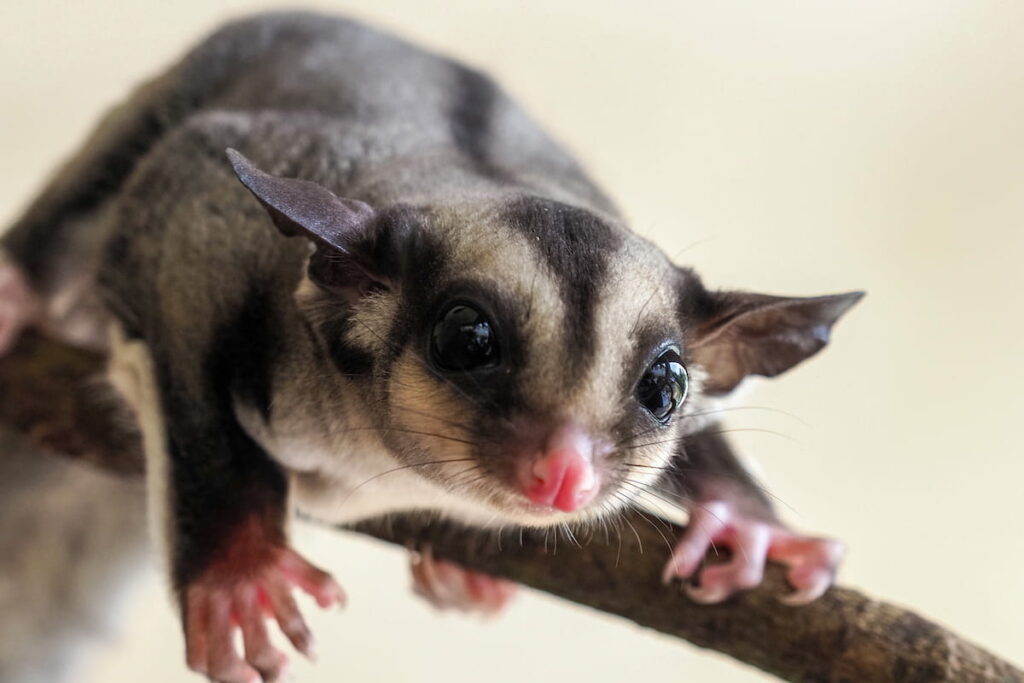
Sugar gliders are little marsupials that are relatively new to the pet trade. They come from the Australian and Indonesian rainforests. Despite weighing a modest 100-160 grams for males and 80-130 grams for females, these critters are balls of energy that take a lot of time and attention to properly care for.

How to care for a sugar glider? There are 4 main elements to master to ensure the proper care for your sugar glider:
- Set up a spacious cage.
- Feed them a balanced diet.
- Practice safe handling at least once daily.
- Monitor for illnesses.
Each of these elements takes time to master, so don’t rush yourself as you welcome your new glider home. The worst thing you can do for both you and your pet is neglect to do enough research or preparation before bringing them home. So, for all facets – especially handling – follow the provided guidelines carefully to ensure the best, most fulfilling bonding experience for you and your new sugar glider.
Table of Contents
How to Set Up Your Sugar Glider’s Cage
There is only so much time that you can allow your sugar glider out of their cage. During the times in the cage, you must try to provide the most enriching experience possible. When designing your sugar glider’s cage, you need to make sure that it has ample room to jump and run around, along with toys to keep your glider active.
When choosing a cage, the elements you need to keep in mind are:
- Space: The ideal cage size for a sugar glider is 24” deep x 24” wide x 36” tall. (source) This includes the footprint of your cage, along with its height and width. Sugar gliders love to hop and jump and run around, so make sure to purchase a cage that allows them the area to do so.
- Ventilation: Ideally, you’ll have a wire cage for your glider. This provides the greatest ventilation for their home, preventing illnesses from any residue buildup that may result in molding or bacterial growth. Make sure that the wiring is still comfortable for your sugar glider to walk and climb on.
- Accessibility: You don’t want to struggle to clean your glider’s cage. Make sure that you will be able to reach into it comfortably, and removable components such as waste trays are a huge bonus.
Again, although the floor space of the cage is important, you must prioritize the vertical dimensions due to sugar glider behavior. Of course, you can always opt for a cage that is larger than this. If so, simply make sure that the wiring always has a maximum of ½” spacing.
Lastly, the ideal temperature for a sugar glider’s catch is between 70 and 90◦F. Avoid placing their cage too close to the window so it does not end up in direct sunlight and overheat or become too drafty.
What to Be Wary of When Shopping for a Sugar Glider Cage
Some manufacturers claim that the orientation of the bars plays a significant role in your sugar glider’s wellbeing. There have been many false claims that vertical wiring increases the chances of your sugar glider becoming injured or simply won’t know how to navigate the bars.
There is no need to get too caught up in this aspect, as your glider will be able to climb the wiring whether it is vertical or horizontal.
Be wary of sales strategies that also claim that your sugar glider will need a small travel cage to start as a joey. This is a tactic used frequently with the argument that your young joey will be overwhelmed with the amount of space available in a large cage – this is another myth aimed at influencing new sugar glider owners to purchase more products than they actually need.
Accessories for Your Sugar Glider’s Cage
Now that you have an idea of the dimensions you need, what do you put into a sugar glider’s cage? Some accessories to consider adding to the cage include:
- Shelving: Some cages are sold with shelving, while others are sold bare. Adding shelves to your cage will increase the surface area on which your glider will be able to play and jump around, or even rest if it so chooses. Just be careful not to overcrowd the cage with too many shelves.
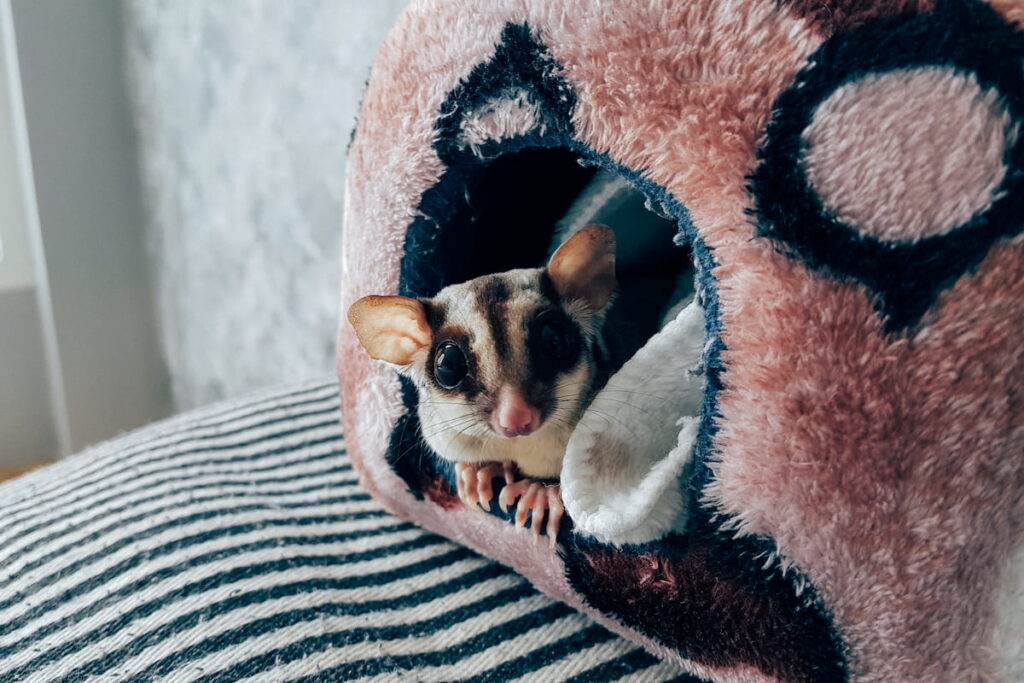
- Bedding: There are multiple choices of bedding for your glider. You can either set up a layer of cedar shavings at the bottom of the cage (which is also great for collecting waste) and on a shelf or two or set up a hanging nest pouch. A nest pouch will provide a cozy place where your glider can nap and keep warm.
- Toys: Toys are incredibly important for enrichment purposes. Giving your glider toys such as dangling, wire-free vines, ropes, wheels, and treat balls. Note that if your glider is young or has babies, you’ll need to hang the toys lower in the cage to prevent injury if they fall.
- Plants (either fake or real): Having leafy vines in your sugar glider’s cage is a great way to make the set up feel significantly more natural to both you and your pet. You can choose to buy pouches and toys that have fake leaves already or opt to add real plants instead. Sugar gliders are natural pollinators and enjoy eating flowers such as hibiscus and roses.
- Food dishes: The best option for food dishes is stainless steel. This is the most hygienic material and can be cleaned easily. Your chosen food dishes should be relatively large, but not too big – otherwise, your glider may become too comfortable and climb in to soil their food or water. Food should always be provided in a bowl; however, water can be offered in either a bottle or bowl, whichever is best suited to your pet.
What to Feed Your Sugar Glider
The proper sugar glider diet is still a topic of debate. Since they are relatively new to the pet trade, the general public and experts alike are still discovering exact guidelines for feeding.
The most important thing to address in a preventative sense with sugar glider diets is their predisposition to metabolic bone disease. Their diet must provide abundant calcium and phosphorus to keep them as healthy as possible.
With that, you must also be mindful of the ratio of calcium to phosphorus you are feeding your glider.
If your glider consumes more phosphorus than calcium, the calcium may be leached from their bones and organ tissues to balance the levels of the two minerals in the blood.
This can result in weakened bones, increasing their chances of fracture and other calcium-related health complications.
Dr. Johnson-Delaney, an expert on sugar glider diets recommends the following feeding regime:
- Prepare the Leadbeater’s Mix using the following ingredients:
- 150 ml warm water
- 150 ml honey
- 1 boiled egg, with the shell
- 25g high protein baby cereal
- 1 tsp vitamin supplement
- Mix the warm water and honey first, then slowly blend in the egg. Add the vitamin supplement, followed by the cereal. Mix until smooth.
Keep the Leadbeater refrigerated until you are ready to serve it to your sugar glider, ideally one tablespoon once per day. Along with the Leadbeater’s Mix, feed your sugar glider:
- 1 tbsp of high-quality insectivore diet or insects (either dried or live). Insects should vary widely. You can feed them:
- Crickets
- Mealworms
- Waxworms
- Moths
- Spiders
- Treats in small servings. Fruits especially make great treats.
You must avoid including any fats and refined sugars in your sugar gliders diet. If at any point you need to make changes to your sugar glider’s diet, do so gradually to avoid making them sick.
For those with multiple sugar gliders in one cage, be sure to monitor them as they eat so that they maintain the proper balance of minerals – you don’t want them sneaking too much of each other’s food!

Handling Your Sugar Glider
For your sugar glider to interact well with you and other humans, you must give them lots of social time out of their cage. This is also to ensure that they don’t go stir crazy by living exclusively in their cage for too long!
Sugar gliders that live in a colony will also benefit greatly from frequent handling, as it will help to rid them of excess energy and not become aggressive with one another.
Before you get started with handling your sugar glider, you must first give them time to acclimate to their new habitat. You don’t want to rush them into physical interactions too early on, as the fear may be difficult to overcome for your glider and damage your relationship in the long run.
Allow them to get used to the scents, sounds, and all other stimuli in their new cage and do your best to prevent stressful events.
Never attempt to train or interact with your sugar glider with negative feedback. They are quite fragile creatures and need to be handle gently. Protect it from anything that may frighten them. Here are a few things to avoid when handling your sugar glider:
- Hitting them in any way (smacking, tapping, or popping)
- Placing them under flowing water
- Handling it in a confined space or otherwise restricting its movement
- Wearing gloves (this will block your scent, which you need them to get used to)
If, when you approach your sugar glider, they display either of these two behaviors:
- Crabbing: This is a noise that sugar gliders make that can tell you when it is frightened, hungry, unhappy, or other generally negative emotions. If your sugar glider does this when you approach, it is best to assume that it is getting ready to bite, and you should leave it alone.
- Lunging: Clearly, this is a behavior indicating that your sugar glider is unhappy to the point of aggression. If your sugar glider is lunging at you when you go to pick it up or otherwise interact with it, you need to give it more time to acclimate to its environment, and your scent. It is likely getting overwhelmed with too many stimuli and is simply unable to comfortably interact at that moment.
How to Handle Your Sugar Glider for the First Time
Now that you know what to avoid and to watch for when handling your glider, you can prepare to pick it up. Here are some steps for you to take when getting ready to handle your new sugar glider:
- Familiarize them with your scent. Wear a shirt or sleep with a light blanket (any light material that won’t be too heavy or bulky for your glider’s cage) for one full day and night and place it on top of the cage for approximately 3-7 days.
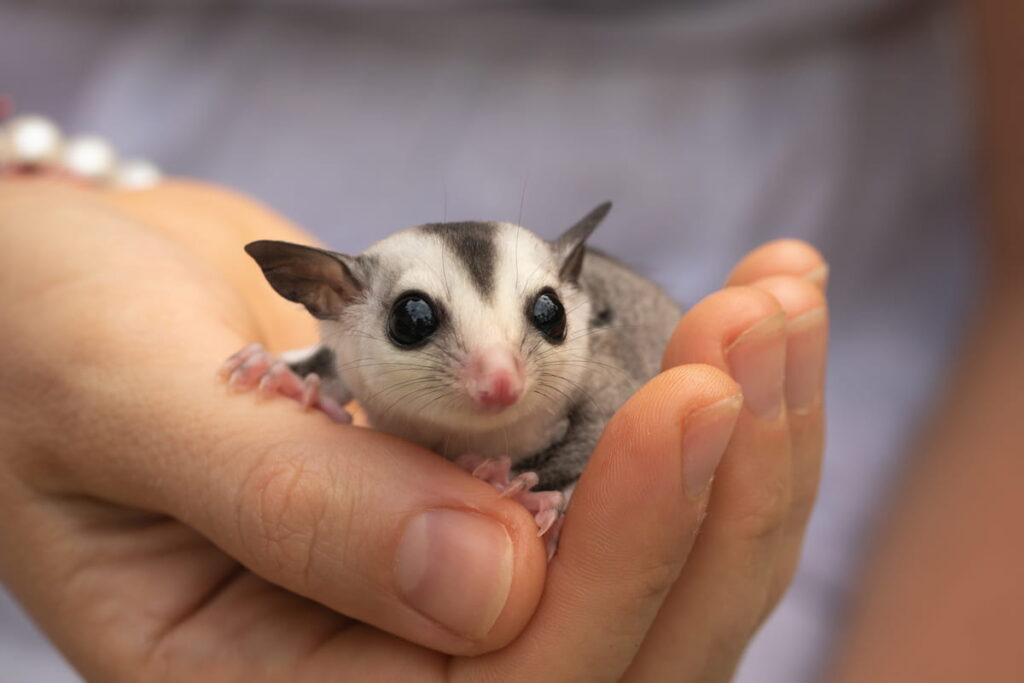
- Picking them up for the first time. You will need the shirt again for this step. You can either wear the shirt from the previous step when you go to pick them up, or simply wear a shirt with pockets, and line the pockets with it and their favorite pouch, perhaps. Note that, the first time may be stressful no matter how you prepare, scoop them up gently and cup them in your hands until they calm down. See further details below.
- Bonding time. When you’re holding your sugar glider for the first time, you’ll want to keep them with you for a maximum of 30 minutes. This is a great amount of time for them to get used to the feeling of being held/carried without giving them too much time to become stressed or panicked.
- Putting them back. Now that your half-hour is up, gently place your glider back in their cage for the evening. Put the shirt back on top of their cage every night until you know that they’ve fully bonded with you.
Whenever you are holding your sugar glider, do not leave the house or go outside, especially in the very beginning. This is because you cannot be completely sure of how your sugar glider is going to react to being held, and you cannot risk having become spooked and jump off of you.
The best times to handle your sugar glider are in the daytime and early evening. The daytime can be used primarily to bond, while the night is reserved for slightly high-energy play (since they are nocturnal animals, this is when they’ll have the most energy).
Tips for Picking Up a Sugar Glider
Ideally, you will have already initiated the bonding process and your glider is becoming more familiar with your scent. That’s great! You’re on the right track. When you are ready to pick them up for the first time, you must realize that, even with a gentle touch, they may be scared. That is only natural.
Give them space for extreme displays of fear or aggression, but feel free to progress if they are only gently vocalizing or subtly shying away from your touch. For a scared glider, adhere to the following guidelines to ensure a safe interaction:
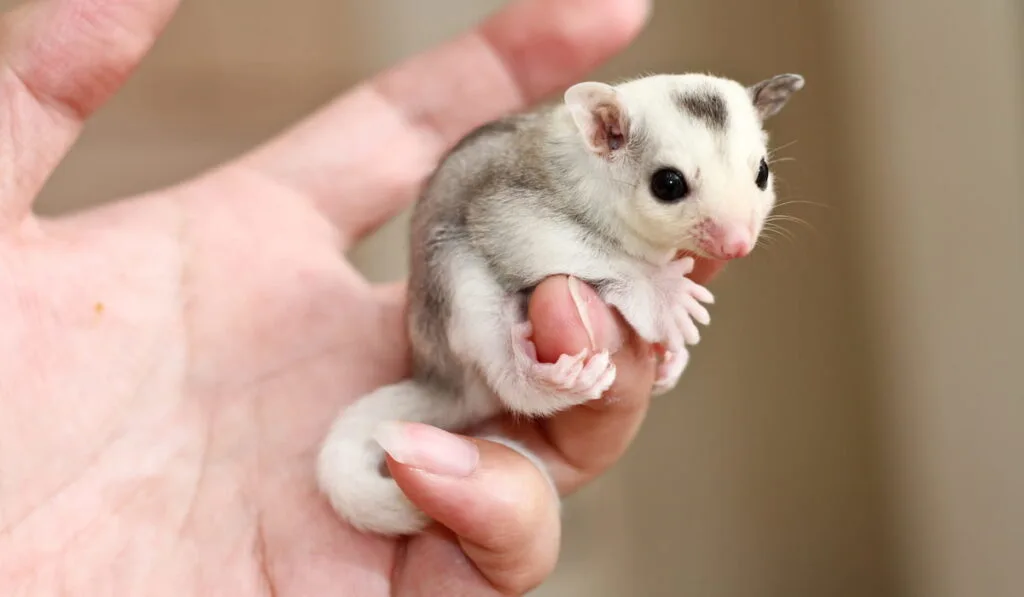
- Cup your glider in your hands so that they are completely enclosed. The dark, tight space is comforting and familiar since they are a marsupial. Of course, do not squeeze too tight or shake them around.
- Once they’ve quieted down and become still, open up your hold by sliding one thumb underneath their chin and positioning your index finger at the top of their head, using the rest of your hand to hold their body firmly, but not too tight. You’ll need to practice this for a few days for both of you to become comfortable.
- Let your glider to become familiar with your touch by using your other hand to gently massage their head. A good sign that your technique is working is if your glider begins to doze off in your hands.
- After you both have become comfortable with this step, you can allow them to move through your hands. Open up your hands and alternate one in front of the other so your sugar glider continually crawls through. Be mindful that fearful gliders may suddenly jump forward or backward to try and escape.

Should I Keep More Than One Sugar Glider?
Sugar gliders are social creatures, so it is strongly advised that you adopt more than one sugar glider at a time. In the wild, they live in large groups, so, in a captive setting, you must have at least two at a time for the following benefits:
- Socialization
- Emotional and mental wellbeing
- Easier adaptation to their new environment
You can choose to either house the same sex in one cage or opposite sexes. According to current knowledge regarding sugar gliders, both do well together – although your chances of positive interactions in male-female or male-male cages are better once you have your male neutered. Neutered males will provide your gliders the following benefits in social cages:
- Reduced chances of aggression
- They will be more comfortable in large social groups and will more readily exhibit natural behaviors
- Overall more positive social interactions
Some people go the extra mile and keep relatively large numbers of sugar gliders in one cage to form a “harem” (a large group of females). This is not recommended unless you have extensive experience in caring for these animals and have cared for more than one at a time.
Illnesses Your Sugar Glider May Experience
Common health problems to watch out for include:
- Calcium deficiency
- Obesity
- Digestive problems, especially constipation and diarrhea
- Parasites (Sugar gliders are prone to contracting the same parasites that dogs and cats are like fleas, ticks, lice, tapeworm, etc.)
Providing your sugar glider with regular veterinary check-ups and a balanced diet is a great preventative approach to many of the illnesses they are vulnerable to. To make sure any adverse conditions are handled right away, simply keep a close eye on your new pet and you will notice any unusual behaviors or appearances as soon as they pop up.
Resources:
- https://www.exoticnutrition.com/suggested-cage-requirements.aspx
- http://www.glidernursery.com/glider-garden.html
- https://www.thesprucepets.com/feeding-sugar-gliders-1237335
- http://www.angelfire.com/nb/sugarglider/bonding.html#TRUST
- https://www.petmd.com/exotic/care/all-about-sugar-gliders